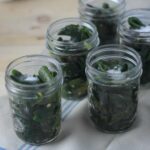
Canning is such a timeless practice, isn’t it? It’s one of those tried-and-true methods that lets us preserve everything from fruits and veggies to meats, ensuring we can enjoy our harvest long after the season’s over. Whether I’m whipping up a batch of homemade jams and jellies, pickling cucumbers, or storing up my summer bounty, one thing I’ve learned is that getting the seal right on my canning jars is absolutely crucial. Without a solid seal, all my hard work could go to waste! So, let’s dive into the nitty-gritty of how to seal canning jars the right way, ensuring that everything stays fresh and safe for months to come.
Why Is Sealing Canning Jars So Important?
Sealing your canning jars properly is crucial, and here’s why: It’s all about keeping your food safe and fresh. A good seal keeps air out, which helps prevent bacteria, mold, and other nasties from ruining your preserved goodies. Whether you’re using the water bath method or a vacuum sealing system, the goal is the same—create a tight seal that locks in that freshness.
Here’s what a proper seal does for you:
- Keeps bacteria and mold at bay
- Prevents air from getting inside
- Ensures your food stays fresh longer
Sounds simple, right? Well, let’s get into the steps on how to do it right!
i. Understanding the Canning Process: Jars, Lids, and Boiling Water

Credit: theseasonalhomestead.com
Before diving into how to seal canning jars, let’s quickly review the basics of the canning process. You’ll need to:
- Jars: Typically, mason jars work best for canning, thanks to their wide mouths and thick glass.
- Lids: Each jar should have a new, flat lid that fits tightly over the jar. The lid creates the vacuum seal during the canning process.
- Water Bath: A boiling water bath helps heat the jars to a temperature that kills bacteria and creates that all-important seal.
Pro Tip: When sealing mason jars, make sure you use lids that are specifically designed for canning—cheap alternatives just won’t cut it. You can find these lids in most canning supplies stores.
ii. How to Seal Canning Jars: A Step-by-Step Guide

Credit: diycraftsy.com
Here’s where the magic happens! Once your jars are filled and ready, it’s time to seal them. The process is simple but requires attention to detail.
a) Fill Jars
First, make sure your jars are filled with the food you’re preserving. Leave about 1/4 inch of space from the top of the jar. This allows room for the food to expand during processing.
b) Clean the Rim
After filling your jars, use a clean towel or paper towel to wipe the rims. Any food or moisture left on the edges can prevent a proper seal.
c) Place Lids and Bands
Place the flat lid on the jar, then screw on the metal band until it’s just finger-tight. Avoid over-tightening the lid, as this can cause the jar to crack or prevent the air from escaping.
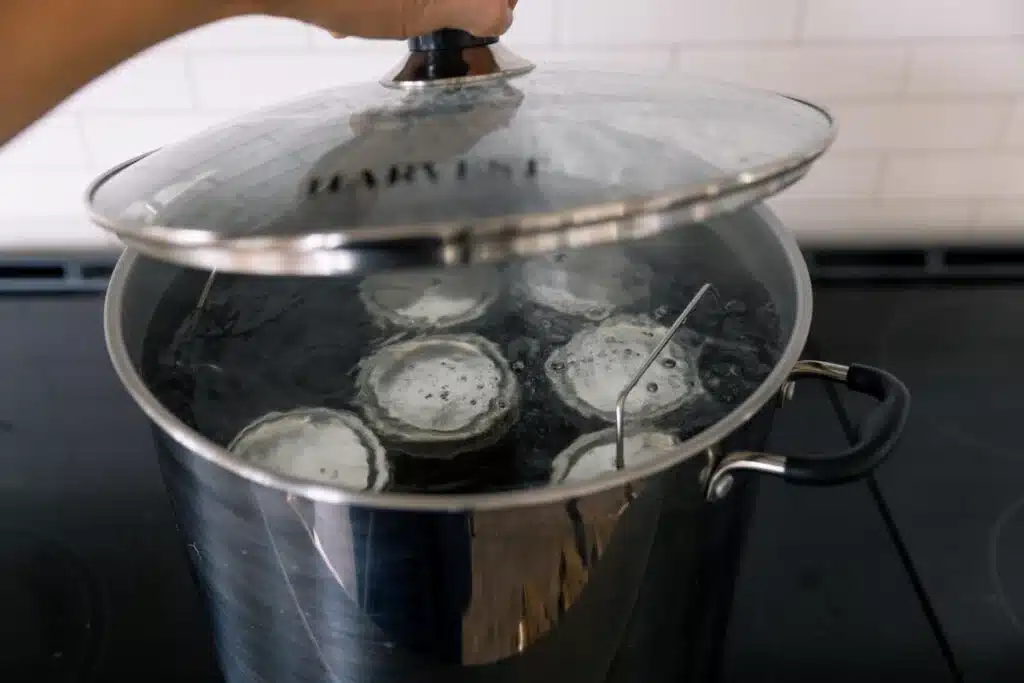
d) Process the Jars
Now comes the fun part—boiling the jars! Place your filled and sealed jars into a canning pot or large boiling water bath. Ensure the water completely covers the jars, and bring it to a rolling boil. The heat from the water will create a vacuum that seals the lids. This can take anywhere from 10 to 30 minutes, depending on the recipe.
How Long to Boil Canning Jars to Seal
You might be wondering, “How long to boil canning jars to seal?” The time needed to seal canning jars depends on the contents and size of the jar, as well as your altitude. As a general rule, most canning recipes recommend boiling for 10 to 30 minutes. For instance:
- Jams and jellies: Typically, these require a 10-15 minute water bath.
- Vegetables and meats: These may need a bit more time, around 20-30 minutes.
But remember: Always follow the processing time recommended for your specific recipe to ensure proper sealing and safety.
The Key Differences: Canning vs Vacuum Sealing

Credit: chowhound.com
When it comes to food preservation, you may wonder whether canning or vacuum sealing is better. Let’s explore the differences:
- Canning: Involves placing food in jars and sealing them with heat to create a vacuum. This method is ideal for high-acid foods like jams, jellies, fruits, and tomatoes.
- Vacuum Sealing: Uses a vacuum sealer to remove air from bags, then seals them to preserve the contents. It’s best for storing meats, cheeses, or dry goods.
So, if you’re looking to store jams and jellies or other high-acid foods, water bath canning is the way to go. If you’re working with meats, vacuum sealing might be more appropriate. But remember, both methods can keep food safe and fresh for extended periods.
Vacuum Sealing vs Canning: Which One Is Better?
This is a common debate in the preservation world. Here’s the quick breakdown:
Vacuum Sealing
- Best for dry or frozen foods.
- Doesn’t require boiling or special equipment.
- Saves space in your pantry.
- Great for short-term storage.
Canning
- Best for high-acid foods (like jams and jellies) or low-acid foods (like pickles and vegetables).
- Can store foods for up to a year or more.
- Requires boiling water and specific canning tools like jars and a canning pot.
Ultimately, it comes down to what you’re preserving and how long you want to store it. Both methods have their pros and cons, but knowing how to seal canning jars properly will ensure your food stays fresh for months.
Common Problems with Canning and How to Fix Them

thegraciouswife.com
Even the most seasoned canners run into issues from time to time. Here are some common problems with canning and tips for fixing them:
- Canning False Seal: If your jars don’t seal correctly, it could be due to an improper lid or too much air in the jar. Make sure the rims are clean and the lids are in good condition.
- Canning Lids Not Sealing: If you notice that your canning lids aren’t sealing, check the following:
Are the jars filled correctly?
Did you wipe the rims thoroughly before sealing?
Did you use new lids? Old lids may lose their ability to seal. - How Do Canning Jars Seal? During the water bath canning process, the heat causes the air inside the jar to expand and then contract, forming a vacuum seal. That popping sound you hear once the jars cool down is the sound of a successful seal.
Final Word
Now that you know how to seal canning jars, why not take your canning skills even further? Explore other helpful canning topics to make your preserving journey even easier!
By following these simple steps on how to seal canning jars properly, you’ll ensure your homemade preserves stay safe, fresh, and absolutely delicious. Whether you’re boiling your jars to seal them or using a vacuum sealer, mastering the right technique will guarantee that your food remains perfectly preserved for months to come. Happy canning, and here’s to enjoying the flavors of the season all year round!
FAQ’s
Got questions regarding sealing your cans? Let’s answer them.
What if my canning lids don’t seal?
If the lids don’t seal after processing, it could be a sign that there’s food residue on the rim or the lid is damaged. Check and retry!
How long can I store canned foods?
Canned foods can last from 6 months to a year, depending on the type of food and storage conditions.
Can I reuse canning lids?
No, canning lids are designed for one-time use only. Reusing them could lead to a poor seal.
Can I use a vacuum sealer for canning?
No. Vacuum sealing is different from traditional canning. Vacuum sealing is ideal for storing dry foods, while canning requires heating food in jars to create a vacuum.
How do I tell if my jars are sealed correctly?
After cooling, press the center of the lid. If it doesn’t pop back, it’s sealed. If it does, it hasn’t sealed properly.